How do I create a clickable table of contents using the PDF-XChange Editor ?
*Note: In this article, TOC means "Table of Contents"
**Note: The features mentioned in this article are part of the Bookmarks Plugin and each require a license to use, without resulting in the placement of watermarks upon saving the document!
There are a few vitally important steps to creating a table of contents in the Editor. Most importantly, the text must be formatted in a very specific manner. The easiest and quickest way to do this, is by first creating bookmarks.
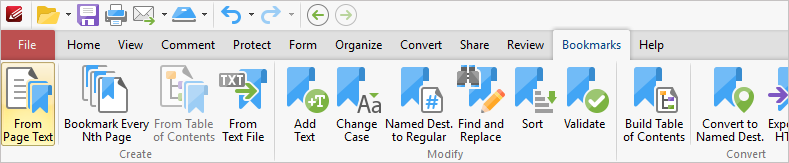
Firstly, you will need to create bookmarks. This is best done using the From Page Text function, located on the Bookmarks tab.
For the best results, make sure that Titles, Headings and Sub-headings are formatted very differently from one another, so they they are easily and clearly identifiable. To elaborate: the title must be different from the heading and sub-heading; the heading must be different from the title and sub-heading; and the sub-heading must be different from the title and heading. This means that text size, the font used and text formatting (bold, italic, etc.) are all vitally important. For my example, I have chosen to A) Make the title text larger than the headings and sub-headings, and underline them (though this cannot be used as an identifier - see note below screen-shot for added detail); B) To bold the headings and make them slightly larger than the sub-headings; C) To italicize the sub-headings and to make them 1 pt. larger than the rest of the text:
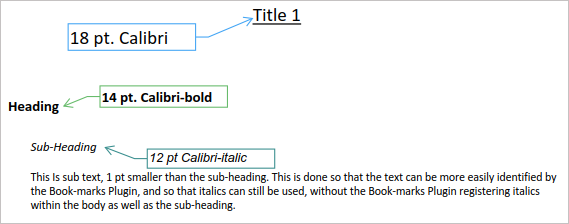
**Note: Underlines are not actually a font style. Unlike Bold and Italic which are defined font subsets (i.e. Arial-bold), there is no subset for underlining, so bookmarks cannot be generated with them**
Once this is done to the whole document (best if done before converting to PDF, if converting from, for example: MS Word), you will then need to click From Page Text. and setup the Bookmarks correctly.
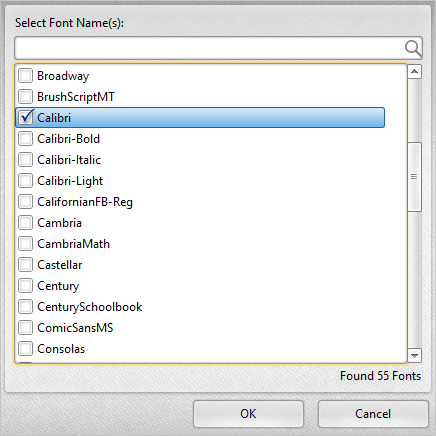
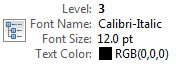
The second step is to setup the bookmarks and different levels of bookmarks, so that they correctly match the text formatting from Step 1. Click the Add button, then select "Text Matching Options" category and add the correct font for the Title. Next, make sure that the font size matches the title text:
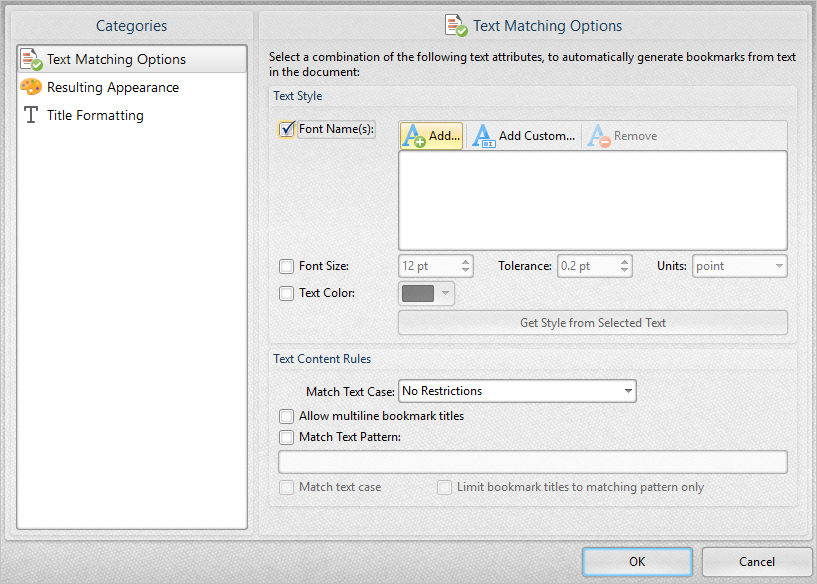
**Note: For bold or italic text, select the correct font subset (i.e. Calibri-Bold, Calibri-Italic)
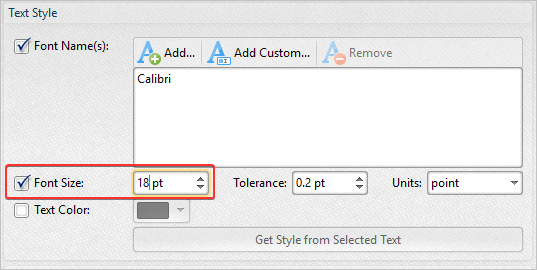
If you have coloured the text differently, you can also add the option to create the bookmark based on colour. This will narrow down the number of bookmarks created.
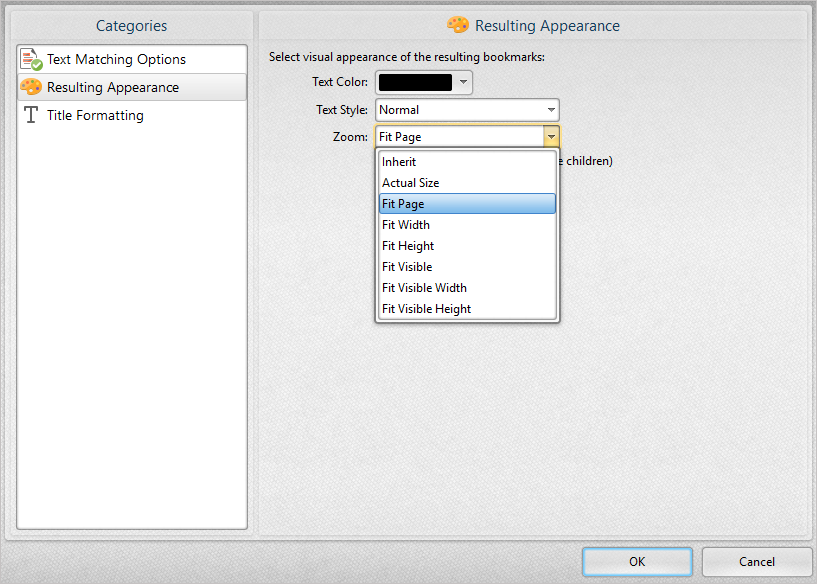
Now click the Resulting Appearance tab, as this will determine how the bookmarks appear within the bookmarks pane and, thereby, the appearance that your TOC will inherit (text colour, style, etc.). You'll also need to make sure that the bookmarks have the correct zoom level. Again, do note that you are setting the desired appearance of the resulting bookmarks, as they will appear in the Bookmarks Pane, NOT specifying further parameters for the creation of the bookmarks, based on the formatting of the document text. See the below screen-shot for a demonstration - in this example, within the Resulting Appearance tab, Titles are unformatted; Headings will be bold; and Sub-headings will be italicized.
For titles, the zoom level should either be set to Fit Page, or Fit Height. For the headings and sub-headings, the zoom level should be set to Inherit:

Now click OK, and either select View > Panes > Bookmarks Pane, or hit Ctrl + B to open the bookmarks pane. You should now see something like this:
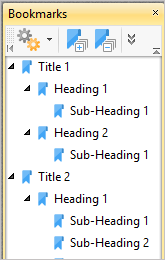
Notice the formatting of the Bookmark names? The titles are unformatted, the headings are bold, and the sub-headings are italicized, because of the options that were selected under the Resulting Appearance tab of the Bookmarks > From Page Text. dialogue.
Create the TOC, using the Bookmarks > Build Table of Contents feature:

This will build the Table of Contents based off of the bookmarks that were just created. Please be aware that you are now not editing each of the levels, above, to match the text of bookmarks in the Bookmarks Pane, you are now setting the text size and formatting options for the text of the TOC that will be generated by this feature:
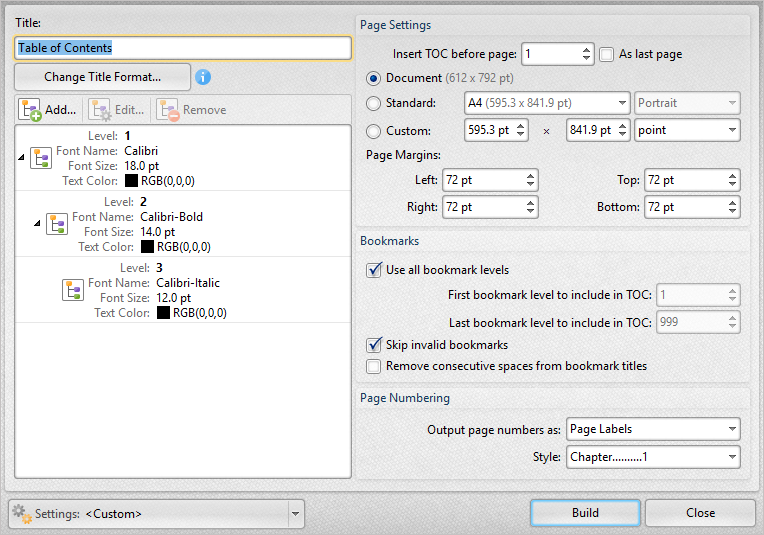
I've outlined which levels correspond with which bookmarks in the following screen-shots:
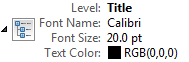
- This is the level that corresponds with the Title of the Table of Contents page, NOT the bookmark "Title" (see red arrow above). In this example, we have simply called it "Table of Contents."
**Note: This Title level is not longer necessary though can be used for formatting preferences
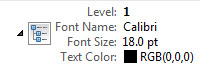
- This level corresponds with the bookmark Title.
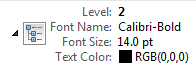
- This level corresponds with the bookmark Heading.
- This level corresponds with the bookmark Sub-heading.
Click the Build button and you should then end up with a TOC that looks something like this: